Building a Contact Form with Bootstrap 5, PHP, MySQL, Twilio, and Email Integration
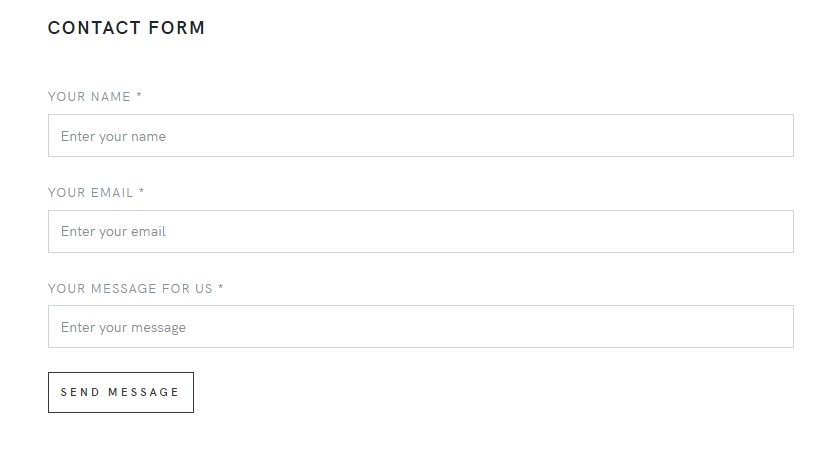
A well-crafted contact form is an essential component of any website, enabling seamless communication between users and site owners. In this tutorial, we will walk you through the process of creating a comprehensive contact form using Bootstrap 5 for the front-end, PHP for server-side processing, MySQL for database storage, Twilio for SMS notifications, and email integration. This feature-rich form will include fields for name, email, phone number, and a message box. By the end of this tutorial, you’ll have a powerful contact form that sends notifications via SMS and email. Let’s dive in!
Prerequisites: To follow this tutorial, you should have basic knowledge of HTML, CSS, PHP, MySQL, and a Twilio account for sending SMS messages.
Step 1: Setting Up the Project
- Create a new directory on your local server and give it a suitable name.
- Download Bootstrap 5 and include the necessary CSS and JS files in your project’s HTML file.
<!DOCTYPE html>
<html lang="en">
<head>
  <meta charset="UTF-8">
  <meta name="viewport" content="width=device-width, initial-scale=1.0">
  <title>Contact Form</title>
  <link rel="stylesheet" href="path/to/bootstrap.min.css">
</head>
<body>
  <!-- Your contact form HTML code here -->

  <script src="path/to/bootstrap.min.js"></script>
</body>
</html>
Step 2: Designing the Contact Form
- Open your HTML file and create a
<form>element with appropriate classes from Bootstrap to structure the form layout. - Add input fields for name, email, and phone number, utilizing Bootstrap form controls and validation classes.
- Include a submit button within the form.
<form action="process.php" method="POST" class="needs-validation" novalidate>
  <div class="mb-3">
    <label for="name" class="form-label">Name</label>
    <input type="text" class="form-control" id="name" name="name" required>
    <div class="invalid-feedback">
      Please provide your name.
    </div>
  </div>
  <div class="mb-3">
    <label for="email" class="form-label">Email</label>
    <input type="email" class="form-control" id="email" name="email" required>
    <div class="invalid-feedback">
      Please provide a valid email address.
    </div>
  </div>
  <div class="mb-3">
    <label for="phone" class="form-label">Phone Number</label>
    <input type="tel" class="form-control" id="phone" name="phone" required>
    <div class="invalid-feedback">
      Please provide your phone number.
    </div>
  </div>
  <div class="mb-3">
    <label for="message" class="form-label">Message</label>
    <textarea class="form-control" id="message" name="message" rows="5" required></textarea>
    <div class="invalid-feedback">
      Please enter your message.
    </div>
  </div>
  <button type="submit" class="btn btn-primary">Submit</button>
</form>
Step 3: Server-Side Processing with PHP and MySQL
- Create a new PHP file named ‘
process.php‘ and configure your MySQL database connection details. - On form submission, use PHP to retrieve the entered data and sanitize it to prevent SQL injections.
- Insert the form data into the MySQL database using prepared statements.
<?php
$servername = "localhost";
$username = "your_username";
$password = "your_password";
$dbname = "your_database";

$conn = new mysqli($servername, $username, $password, $dbname);

if ($conn->connect_error) {
    die("Connection failed: " . $conn->connect_error);
}

$name = $_POST['name'];
$email = $_POST['email'];
$phone = $_POST['phone'];
$message = $_POST['message'];

$stmt = $conn->prepare("INSERT INTO contacts (name, email, phone, message) VALUES (?, ?, ?, ?)");
$stmt->bind_param("ssss", $name, $email, $phone, $message);
$stmt->execute();

$stmt->close();
$conn->close();
?>
Step 4: Twilio Integration for SMS Notifications
- Sign up for a Twilio account at twilio.com and obtain your Account SID, Auth Token, and a phone number.
- Install the Twilio PHP SDK using Composer or by downloading the package.
- In your ‘
process.php‘ file, require the Twilio autoload.php file and configure the Twilio client with your account credentials. - After inserting the form data into the database, use Twilio’s ‘
messages->create()‘ method to send an SMS notification to your phone number.
<?php
require __DIR__ . '/path/to/twilio-php/autoload.php';

use Twilio\Rest\Client;

// Your Twilio account credentials
$accountSid = 'your_account_sid';
$authToken = 'your_auth_token';
$twilioNumber = 'your_twilio_phone_number';

$client = new Client($accountSid, $authToken);

$messageBody = "New contact form submission:\nName: $name\nEmail: $email\nPhone: $phone\nMessage: $message";

$client->messages->create(
  '+123456789',  // Your phone number to receive the SMS notification
  [
    'from' => $twilioNumber,
    'body' => $messageBody
  ]
);
?>
Step 5: Email Integration
- To enable email notifications, you need an email account and access to an SMTP server.
- In your
process.phpfile, use themail()function to send an email notification with the submitted form details. - Customize the email’s subject, recipient address, and content to suit your needs.
<?php
$to = "your@email.com";  // Your email address to receive the notification
$subject = "New Contact Form Submission";
$message = "Name: $name\nEmail: $email\nPhone: $phone\nMessage: $message";
$headers = "From: sender@example.com" . "\r\n" .
           "Reply-To: sender@example.com" . "\r\n" .
           "X-Mailer: PHP/" . phpversion();

mail($to, $subject, $message, $headers);
?>
Step 6: Confirmation Message and Error Handling- After processing the form, display a confirmation message to the user on successful submission.
- Implement error handling to display appropriate error messages in case of any issues during form submission.
<?php
// Add the following code at the end of your `process.php` file

if ($stmt) {
  // Display success message
  echo "<p>Thank you for contacting us!</p>";
} else {
  // Display error message
  echo "<p>Error: " . $conn->error . "</p>";
}

$stmt->close();
$conn->close();
?>
Congratulations! You have successfully created a feature-rich contact form using Bootstrap 5, PHP, MySQL, Twilio, and email integration. This comprehensive solution includes fields for name, email, phone number, and a message box, allowing users to provide detailed information. The form securely stores contact information in a MySQL database, sends SMS notifications using Twilio, and delivers email notifications with the submitted form details. By incorporating these technologies, you have built a powerful contact form that ensures efficient communication with your website visitors. Feel free to customize and expand its functionality to suit your specific requirements. Happy coding!
